"Becoming Victoria"


I am honoured and excited to have been invited by the Llandrindod Wells Victorian Festival committee to appear as a young Queen Victoria at this year's festival from 22nd-28th August 2016. In preparation for this role I will be designing and making the costumes for the young queen over the coming months. These will be authentic reproductions of the fashions of the early years of Victoria's reign and will include a range of 1840s women's garments from corsets and petticoats to day dresses, ball gowns and bonnets. This blog will document and share my progress as I research, design and stitch each element to reveal the secrets of "Becoming Victoria".
Showing posts with label corset. Show all posts

Saturday, 25 June 2016

One down, a dozen or so to go!

57 days to go and the corset is complete.

Front view an the mannequin

The finishing touches included binding the top and bottom of the corset, stitching the flossing (decorative stitches that help keep the boning in place) and neatening and finishing all of the edges inside the corset.

I used strips of blue linen cut on the bias (diagonally across the material to allow some stretch) to bind the edges of the corset. These strips were hand-stitched to the corset from the outside and then folded over and slip-stitched to the inside to cover and reinforce the raw edges.

Applying the linen binding to the edges of the corset
Then, once all of the loose edges had been carefully stitched down on the inside of the corset, it was time for the flossing. The term flossing refers to embroidery stitches used specifically on corsets that were designed to keep the bones in place and prevent them from moving around and poking through the fabric of the corset. As well as this practical function, they were also highly decorative and used to enhance the aesthetic appearance of corset, especially when worked in contrasting colours. For an excellent tutorial on how to create flossing stitches visit Sidney Eileen.com

An example of decorative flossing stitches on an original corset, 1893-97, Glasgow Museums, PP.2002.8.13_02
The flossing on my corset was worked using the same cotton floss as the other embroidery. The criss-crossed stitches cradle the end of each bone and extend up the sides to hold them firmly in their channels. These stitches are worked right through all the layers of the corset.

Flossing at the lower edge of the corset
And finally, fully laced with 7m of cotton lacing, the corset is ready to be worn. The next step in the project will now be to complete the petticoats. It is important to have all of the layers of underwear in place before starting the outer garments as Victorian clothes were very tight fitting. For gowns to be able to hug the figure and lie smoothly, very careful measurements should always be taken over the underwear to ensure a perfect fit.

A back view of the corset lacing

Thursday, 23 June 2016

When home sewing becomes DIY


60 days to go and time to bone the corset.

In the nineteenth century, corsets could be boned with whalebone (actually the baleen, or teeth of the whale) or, thanks to advances in industrial technology, steel. Whalebone was a particular favourite as this natural material which has a consistency somewhere between hair and horn is light, elastic and flexible. Whalebone could be split into thin strips and still retain all of these features and, if softened in hot water, could be shaped to the form of the corset where it would remain set once dry and cold. However, the great demand for baleen meant that the numbers of these magnificent creatures dwindled as they were constantly hunted. The answer to the scarcity and rising price of whalebone was steel. By the mid century spring  steel had been invented, flexible enough to bend to the shape of the corset.*

An example of baleen on display in Colonial Williamsburg. Picture from The Two Nerdy History Girls. Click here to read their interesting short article on baleen.


This is the material used for corsetry today. Solid steel or spiral steel (tightly coiled and flattened wire) bones provide excellent support for garments such as corsets, but are light and flexible enough to shape to the body. Corsets are also still fastened with steel busks (wide, strong bones with hook and stud closures) and metal lacing eyelets, patented in 1829 and 1828 respectively.

The two halves of the busk are inserted between the corset and facing at the front edges. Spaces in the stitching allow the hooks to poke through the seam and an awl is used to pierce holes for the studs. And in a taste of what is to come, safety goggles are worn when sewing around the busk as sewing machine needles break and fly up in the air very easily if they accidentally hit the steel!

Front fastening buck inserted
 For the next stage even more DIY tools are required. Setting the lacing grommets in the back of the corset involves no sewing whatsoever but a fair amount of hammering. The grommets (or eyelets) come in two parts. The side with the long shaft is inserted through a hole pierced in the right position and the second side, resembling a washer is placed over this. A special tool is then used which, when hit with a hammer, forces the shaft to roll back over the washer to secure the eyelet in position.

An array of tools for setting the grommets

The two halves of an eyelet

The grommet setting tool in action
And a good whack with a hammer!


Finally the bones themselves can be inserted into the channels sewn earlier. I was using continuous spiral steel for this project, so once again raided the tool box for lethal looking items to try to cut the steel (not an easy job) and fix the end caps in position. With the bones cut to the tight length and the ends finished, these were then inserted into the channels ready or the top edges of the corset to be bound.

Scary wire and tools...and the safety goggles again because this stuff springs everywhere!

Close up of the spiral wire
And finally, the result. One corset ready to be finished tomorrow:

Front with busk

The back with eyelets
 * References
Norah Waugh, Corsets and Crinolines (Routledge/Theatre Art Books, Oxon, 1954).

Tuesday, 21 June 2016

The corset construction progresses...

65 days to go and the corset is now almost ready to be boned...


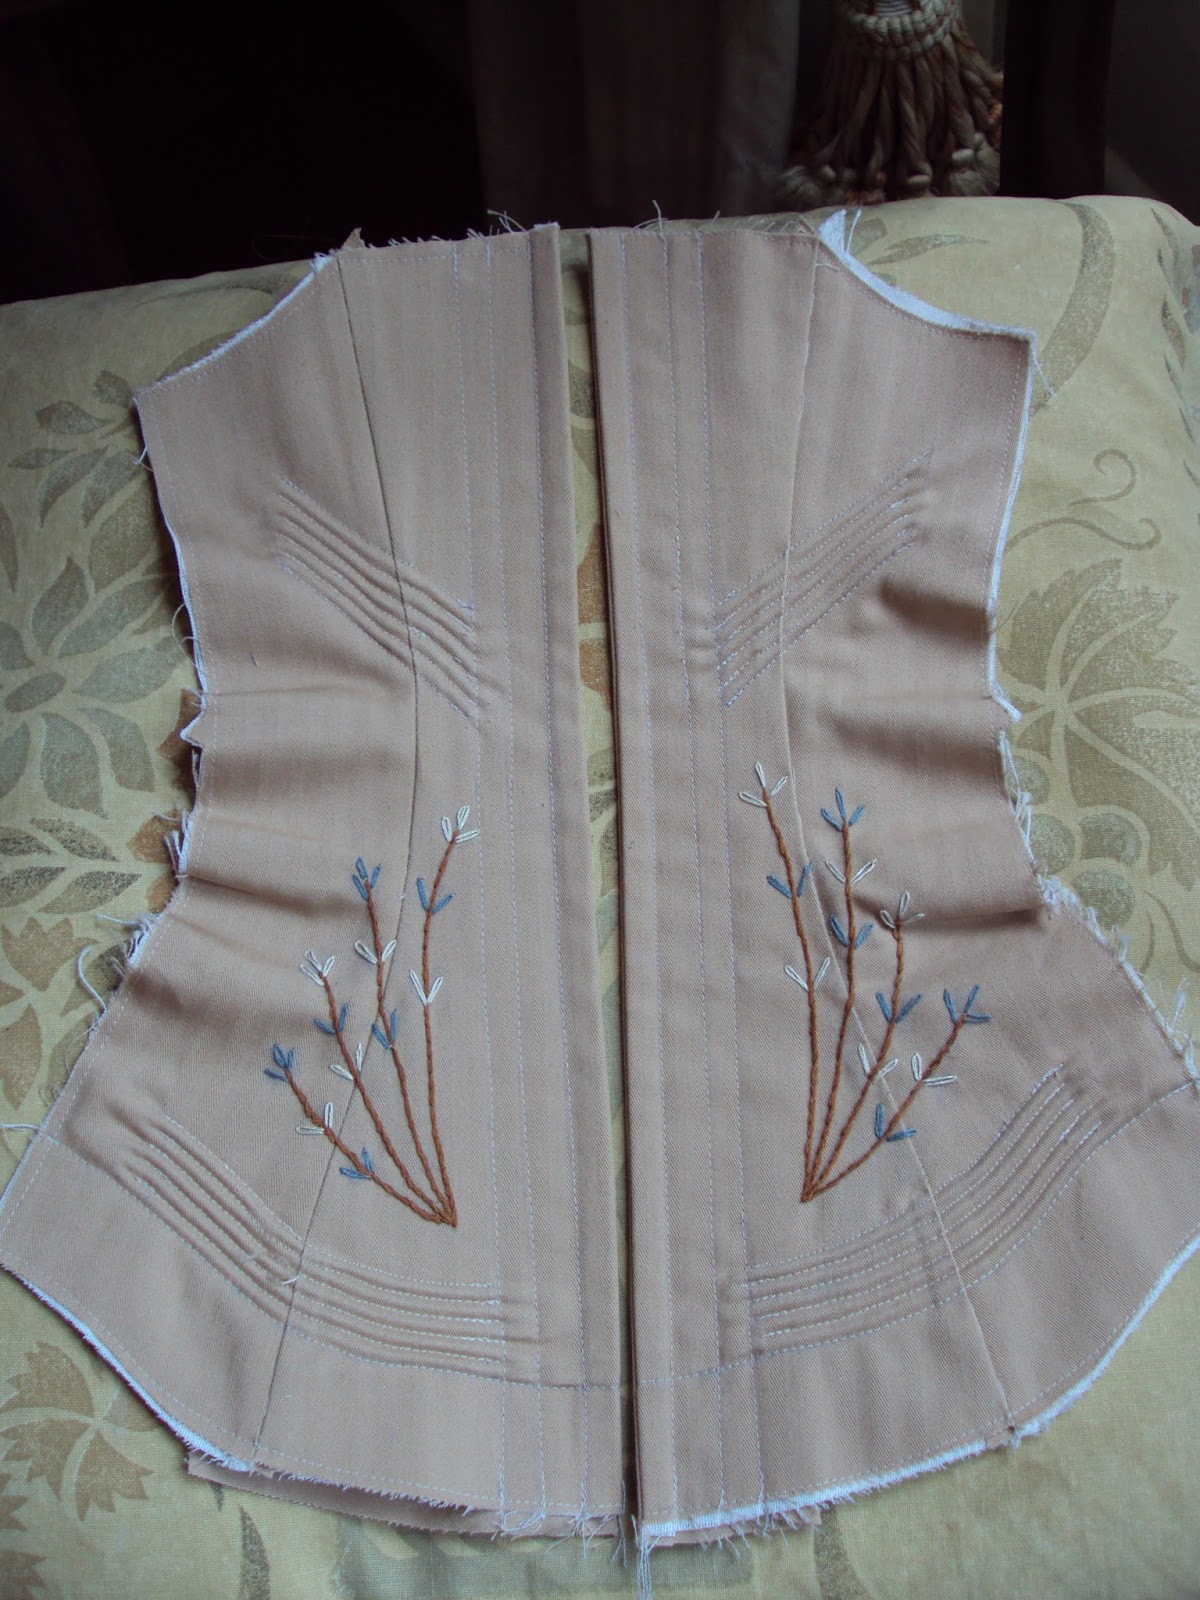
All of the panels have been joined and the gores inserted to complete the two halves of the corset. The seams are sewn twice using two different stitch lengths. This helps to strengthen the seams so that they can withstand the tension exerted on them when the corset is laced without ripping apart as though perforated. The seam allowances are then pressed to one side and 3/8" channels are stitched to one side of each seam. It is into these channels that the steel bones will be inserted. Additional vertical cording also supports the wider side panel. The photographs show how the shaping of the pieces at the hip and the insertion of the gores create a three-dimensional form that will hug the body to create the desired silhouette.

Both sides of the corset, pinned in the centre to simulate the look of the final garment

Friday, 17 June 2016

Cording a corset

 66 days to go...

As well as rigid boning, cording is an age old method for stiffening fabric to create structure in garments. It involves sandwiching a thin cord between two layers of fabric held in place inside closely stitched channels to create raised ridges in the surface of the fabric. This method was widely used in the nineteenth century for stiffening both corsets and petticoats. It also serves a double purpose by creating visual interest and was often used decoratively as well as practically especially on early Victorian corsets.

Corded corset in the V&A Collections, 1825-1835
For this project, I decided to combine steel boning to support the seam lines with cording. In particular the back panel features diagonal and horizontal cording that was inspired by the 1844 corset shown in Norah Waugh's "Corsets and Crinolines" (Waugh, Routledge/Theatre Arts Books, 1954, p77).


I inserted the cording by stitching a single line through the outer shell and lining. I then placed the corded in position and pushed it as snugly against the stitching as I could with my thumbnail. Then, still using my nail to keep the cord in place, I sewed the other side of the channel as close the cord as as possible using the zipper foot on the machine. This worked like a dream and the corset now has beautifully corrugated sections.

Sewing the cording into position
The completed back panels